Living Room Chandelier Size & Wattage Guide for Perfect Lighting
Getting the right chandelier for your living room isn’t just about looks; it’s about creating a comfortable, functional space. The quick answer? A properly sized chandelier will generally be about half to two-thirds the width of your room, and its wattage should provide enough ambient light without being blinding – usually around 20-40 lumens per square foot, adjusted for other light sources. Let’s dive into the details so you can pick the perfect one.
Sizing Up Your Chandelier: Finding the Right Dimensions
Choosing the right size chandelier is crucial for balance and aesthetics in your living room. Too small, and it looks lost; too large, and it overwhelms the space. It’s not just about the fixture itself, but how it relates to the room’s dimensions and your furniture layout.
The Diameter Rule of Thumb
A common and very practical rule for determining the ideal chandelier diameter is to add the length and width of your living room (in feet) and then convert that sum to inches. This gives you a good starting point for your chandelier’s diameter.
For example, if your living room is 15 feet long and 10 feet wide:
15 feet + 10 feet = 25 feet
So, a chandelier with a diameter of approximately 25 inches would be a good fit.
This method ensures the chandelier feels proportionate to the room as a whole, rather than just one dimension. It creates a visual anchor without dominating the ceiling space.
Considering Ceiling Height for Chandelier Drop
The height of your ceiling plays a significant role in how low your chandelier should hang. You don’t want people bumping their heads, nor do you want it so high it loses its impact.
A general guideline is to allow 2 to 3 inches of chandelier height (including any chain or rod) for every foot of ceiling height. For an 8-foot ceiling, a 16 to 24-inch high chandelier might be appropriate.
However, a more common and easier rule to remember for living rooms (where people are often standing or sitting underneath) is to ensure the bottom of the chandelier is at least 7 feet (84 inches) from the floor in areas where people walk underneath it. If it’s over a coffee table, you can go lower, but more on that in a moment.
Chandelier Placement Relative to Furniture
Where your chandelier hangs in the living room significantly impacts its perceived size and functionality.
If it’s centered in the room and serves as primary ambient lighting, the general diameter and height rules apply. However, if it’s positioned over a specific furniture grouping, like a seating area around a coffee table, you have a bit more flexibility.
For chandeliers hanging above a coffee table, the bottom of the fixture should be about 30 to 36 inches above the tabletop. This allows for clear sightlines across the table and prevents people from hitting their heads when sitting or standing up from the sofa. It also helps to define the seating zone without visually cluttering it. Make sure the chandelier’s diameter is not wider than the coffee table, ideally being about two-thirds to three-quarters the width of the table.
Understanding Wattage and Lumens: Brightness for Your Space
Beyond its physical size, the light output of your chandelier is paramount. We often talk about wattage, but lumens are the more accurate measure of brightness. Understanding both, and how they relate to your living room’s needs, will help you avoid a dimly lit cave or a glaring interrogation room.
Watts vs. Lumens: The Modern Measurement
Historically, we’ve used wattage to gauge bulb brightness. A 60-watt bulb was brighter than a 40-watt bulb. However, with the advent of energy-efficient lighting like LEDs, wattage no longer directly correlates with brightness. A 10-watt LED bulb can be significantly brighter than a 60-watt incandescent bulb.
Watts measure the amount of energy a light bulb consumes.
Lumens measure the total amount of visible light produced by a bulb. This is the crucial number for determining brightness.
When shopping for bulbs, always look for the lumen rating. Most packaging will list an “equivalent wattage” to help you compare to older incandescent bulbs, but lumens are your true guide.
Calculating Needed Lumens for a Living Room
To figure out how many lumens you need for your living room, you’ll first need to know the room’s square footage.
Multiply the length of your room by its width to get the square footage.
For example, a 15-foot by 10-foot room is 150 square feet.
Next, consider the general recommendation for living rooms. For general ambient lighting, a good starting point is usually between 20 to 40 lumens per square foot. The exact number depends on several factors:
- Room Function: A living room designed primarily for relaxing and conversation might be on the lower end (20-30 lumens/sq ft), while one used for reading or hobbies might need more (30-40 lumens/sq ft).
- Existing Light Sources: If you have other light sources like floor lamps, table lamps, or recessed lights, your chandelier might only need to provide a portion of the total lumens. It’s often meant as a central decorative and ambient light, not the sole source.
- Wall Color: Lighter walls reflect more light, making a room appear brighter with fewer lumens. Darker walls absorb light, requiring more lumens to achieve the same perceived brightness.
- Natural Light: Rooms with abundant natural light during the day will need less artificial light in the evening compared to those with fewer windows.
Let’s apply this to our 150 sq ft living room example:
- For a moderately bright ambient light, aim for around 30 lumens per square foot.
- 150 sq ft * 30 lumens/sq ft = 4500 total lumens.
If your chandelier uses multiple bulbs, you’d divide this total lumen requirement by the number of bulbs it holds to get the approximate lumen output needed per bulb. For instance, if your chandelier has 8 sockets, you’d need bulbs that produce about 560 lumens each (4500 / 8 = 562.5). This is roughly equivalent to a 40-watt incandescent bulb for each socket, or a 6-8 watt LED.
Dimmers: Your Best Friend for Living Room Lighting
A dimmer switch is highly recommended for any living room chandelier. It provides invaluable flexibility, allowing you to adjust the light output to suit different moods, times of day, and activities.
- Flexibility: Bright light for cleaning or entertaining, softer light for relaxing or watching a movie.
- Energy Savings: Dimming lights reduces energy consumption, extending bulb life.
- Ambiance: Create warm, inviting atmospheres with the flick of a switch.
Ensure that the bulbs you purchase are “dimmable” (especially critical for LEDs), and that your dimmer switch is compatible with the type of bulbs you’re using.
Chandelier Styles and Their Impact on Light Output
Beyond the numbers, the style and material of your chandelier significantly influence how light is dispersed in your living room. A crystal chandelier will scatter light differently than one with opaque shades, and this affects both the functional brightness and the overall mood of the room.
Open vs. Shaded Fixtures
The design of your chandelier’s arms and shades plays a direct role in how much light reaches the room.
- Open-bulb designs: Chandeliers where the bulbs are exposed (e.g., candelabra styles, bare Edison bulbs) provide direct, often unshielded light. These tend to cast light in all directions, creating a brighter, more expansive glow. They are great for general ambient lighting but can sometimes feel intense if the bulbs are too powerful without a dimmer. The light from these fixtures often interacts directly with the ceiling, reflecting downwards.
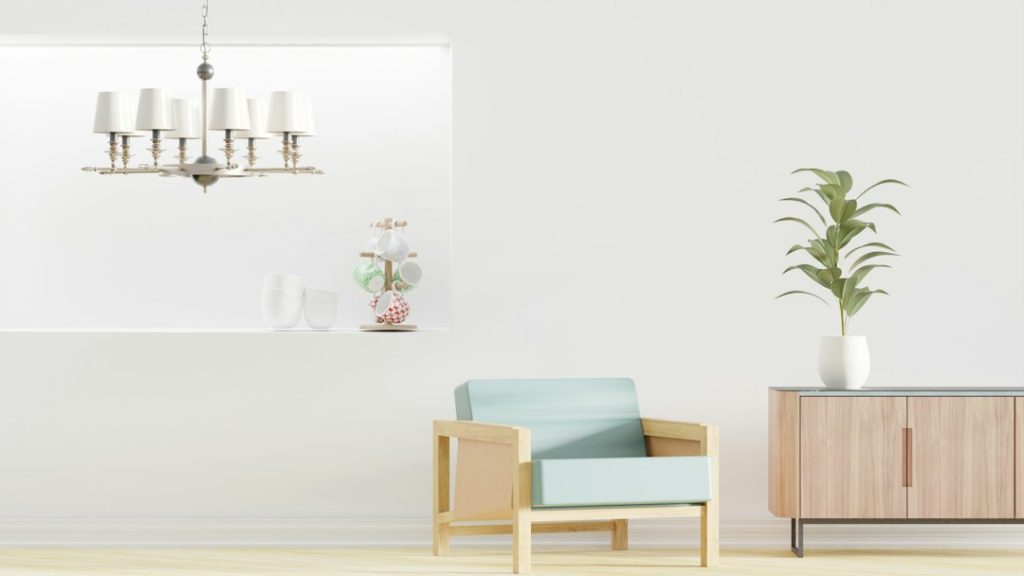
- Shaded designs: Chandeliers with individual shades over each bulb (e.g., fabric drum shades, glass globes) direct and soften the light. Fabric shades will typically diffuse light outwards and downwards, creating a warmer, more intimate glow. Opaque metal shades will direct light more specifically, perhaps only upwards and downwards, creating more dramatic light and shadow. While shaded designs can be very stylish and reduce glare, they often require higher lumen bulbs to achieve the same overall room brightness as an open-bulb fixture because some light is absorbed or blocked by the shade.
Consider the aesthetic you’re aiming for. An open design can feel more industrial, vintage, or classic depending on the bulb style, while shaded designs often lean more contemporary or traditional.
Material Matters: Crystal, Glass, Metal, and Fabric
The materials used in your chandelier affect both its appearance and its light-dispersion properties.
- Crystal and Clear Glass: These materials are fantastic at refracting and reflecting light. A crystal chandelier will create beautiful prismatic effects, scattering tiny specks of light across your walls and ceiling. This adds sparkle and visual interest, making the room feel brighter and more luxurious. While the overall lumen output might be the same as another fixture, the visual effect of dispersed light makes the room feel more alive.
- Frosted or Etched Glass: This type of glass diffuses light, softening the glow and reducing glare. It creates a more uniform and gentle illumination, which can be very pleasant for general ambient lighting. It won’t have the sparkle of clear crystal but offers a consistent, warm light.
- Metals (Brass, Bronze, Iron, Chrome): Metal elements in a chandelier primarily serve as structural and decorative components. If the metal is polished, it can reflect some light, adding a subtle sheen. However, opaque metal shades will block light entirely, directing it only where the shade is open. The finish of the metal (matte vs. polished) also contributes to the overall style and how it interacts with light.
- Fabric Shades: Fabric shades absorb a portion of the light and diffuse the rest. The color and density of the fabric will determine how much light passes through. Lighter, thinner fabrics will allow more light to penetrate, while darker, thicker fabrics will create a more subdued, directional light. Fabric shades are excellent for creating a soft, inviting atmosphere and preventing harsh glare.
When choosing, think about the desired mood. Do you want sparkle and vibrancy (crystal)? Soft and diffused (frosted glass, fabric)? Or more directed and dramatic (metal shades)?
Up-lighting vs. Down-lighting Elements
Some chandeliers feature specific elements that direct light either upwards towards the ceiling or downwards towards the floor.
- Up-lighting: If your chandelier has bowls or cups that direct light upwards, this light reflects off the ceiling, providing a softer, more indirect ambient glow. This can make a room feel larger and brighter, as the light washes over the ceiling. It’s excellent for reducing shadows and creating an even overall illumination.
- Down-lighting: Chandeliers with shades or directed spotlights pointing downwards provide more task-oriented or direct illumination. While a central chandelier isn’t typically for task lighting in a living room, some designs incorporate down-lighting to illuminate a coffee table or a specific area. This can create more defined zones of light and shadow.
Many chandeliers combine both elements, with some bulbs directed upwards and others downwards or outwards. This versatility is often ideal for a living room, allowing for a balanced spread of light that serves multiple purposes. Consider your ceiling color too; a white ceiling will reflect up-lighting more effectively than a dark one.
Bulbs for Your Chandelier: Types and Characteristics
The bulbs you choose for your chandelier are just as important as the fixture itself. Different bulb types offer varying light quality, energy efficiency, and aesthetic appeal. Knowing the pros and cons of each will help you make an informed decision for perfect living room lighting.
Incandescent Bulbs (Traditional)
While largely phased out due to energy inefficiency, some specialized or vintage chandeliers might still use incandescent bulbs, particularly those with a candelabra base.
- Pros: Produce a warm, pleasant light (often around 2700K color temperature). Excellent color rendering (CRI close to 100). Fully dimmable. Relatively inexpensive upfront.
- Cons: Very inefficient, converting most energy into heat rather than light. Short lifespan (around 750-1000 hours). Generate significant heat, which can be a concern for enclosed fixtures or in warm climates.
- Considerations: If you have an older chandelier and want an authentic vintage look, you might still find specialty incandescent bulbs. However, for everyday use, more modern alternatives are usually better.
Halogen Bulbs
Halogen bulbs are an improved version of incandescents, offering slightly better efficiency and a whiter, crisper light. They are still an older technology compared to LEDs.
- Pros: Brighter and whiter light than traditional incandescents. Good color rendering (CRI 95-100). Fully dimmable. More energy-efficient than incandescents (about 25-30% more).
- Cons: Still generate a lot of heat. Shorter lifespan than LEDs (around 1,500-2,000 hours). Can be sensitive to oils from skin when handling (use gloves).
- Considerations: Often used in fixtures that require small, intense light sources. For a living room chandelier, they might be an option if you prefer a slightly whiter light than standard incandescents but aren’t ready for LEDs.
Compact Fluorescent Lamps (CFLs)
CFLs were once heralded as the energy-efficient successor to incandescents, but they’ve largely been surpassed by LEDs.
- Pros: Significantly more energy-efficient than incandescents (about 75% less energy). Longer lifespan (around 6,000-15,000 hours).
- Cons: Often have a slower warm-up time to full brightness. Can produce a “cooler” or less appealing light color (though warmer options exist). Dimming capabilities are often poor or require specialized CFL dimmers. Contain mercury, requiring special disposal.
- Considerations: While energy-efficient, the downsides (light quality, dimming, mercury) make them a less ideal choice for a living room chandelier compared to LEDs.
Light Emitting Diodes (LEDs)
LEDs are currently the gold standard for residential lighting, offering the best combination of efficiency, lifespan, and versatility.
- Pros: Extremely energy-efficient (up to 90% less energy than incandescents). Very long lifespan (25,000-50,000+ hours). Generate very little heat. Available in a wide range of color temperatures (warm to cool white). Many are dimmable (ensure they are explicitly labeled as such). Instant on to full brightness.
- Cons: Higher upfront cost (though quickly offset by energy savings and longevity). Not all LED bulbs are dimmable, and some dimmers may not be compatible, leading to flicker or buzzing.
- Considerations: For a living room chandelier, LEDs are almost always the best choice. Look for “dimmable” LEDs and consider the color temperature (measured in Kelvin, K).
- 2700K – 3000K: Warm white, similar to incandescent, creating a cozy, inviting atmosphere. Ideal for living rooms.
- 3500K – 4000K: Neutral white, good for general tasks, but might feel too cool for a relaxing living room.
- 5000K+: Cool white/daylight, best for task lighting or commercial spaces, generally too stark for living rooms.
Also, check the CRI (Color Rendering Index). A higher CRI (90+) means colors in your room will look more accurate and vibrant under the light.
Installation Considerations and Safety
Once you’ve selected your perfect chandelier and bulbs, proper installation is key for both aesthetics and safety. This isn’t just about wiring; it involves ensuring the fixture is securely mounted and that the electrical box can handle the weight.
Checking Your Electrical Box
This is a critical first step. Not all ceiling electrical boxes are designed to support the weight of a heavy chandelier. Standard electrical boxes are typically rated for fixtures up to 50 pounds. Many chandeliers, especially larger or crystal-laden ones, can easily exceed this.
- Identify Your Box: Before you even think about lifting the chandelier, carefully remove the existing fixture (after turning off power at the breaker!) and inspect the electrical box.
- Weight Rating: Look for a label or stamp indicating the weight rating. If there isn’t one, or if you suspect it’s a standard plastic box, assume it’s only rated for lighter fixtures.
- Reinforcement: If your chandelier is heavy (over 50 pounds), you’ll need to install a special ceiling fan-rated electrical box or a brace specifically designed for heavy fixtures. These are often metal and attach directly to a ceiling joist or span between two joists, providing robust support. This might involve opening up a small section of your ceiling, which is a job best left to a qualified electrician or experienced DIYer.
- Don’t Guess: Never guess if your existing box can hold the weight. A falling chandelier is not only destructive but extremely dangerous.
Ceiling Height and Clearance
We discussed chandelier drop earlier, but it’s worth reiterating in the context of installation.
- Walkways: The bottom of the chandelier should be at least 7 feet (84 inches) from the floor in any area where people might walk directly underneath it. This prevents head bumps and maintains clear sightlines.
- Over Tables: If the chandelier is over a coffee table, the bottom should be roughly 30-36 inches above the tabletop. This provides focused light on the table area without obstructing views or making it awkward to stand up.
- Visual Balance: Step back and assess the visual balance. Does it look too high and lost, or too low and imposing? Sometimes, even with the rules, minor adjustments by a chain link or two can make a big difference visually.
Wiring and Dimmer Switch Installation
Proper wiring is essential for safety and functionality. If you’re not comfortable with electrical work, it’s always best to hire a licensed electrician.
- Turn Off Power: ALWAYS turn off the power to the circuit at your main electrical panel before beginning any wiring work. Verify with a non-contact voltage tester.
- Wire Matching: Connect like-colored wires: usually black to black (hot), white to white (neutral), and green or bare copper to green or bare copper (ground).
- Secure Connections: Use appropriate wire nuts and ensure all connections are tight and secure.
- Dimmers: If you’re installing a dimmer, ensure it’s compatible with the type of bulbs you’re using (especially important for LED dimmers). Follow the dimmer’s specific wiring instructions carefully. Dimmer switches often require a neutral wire connection that standard on/off switches might not have, so check your existing wiring.
- Test Before Final Mounting: After making connections, carefully tuck wires into the box, temporarily secure the canopy, turn power back on, and test the light and dimmer before fully mounting the chandelier.
Professional Installation Considerations
While installing a basic light fixture can be a DIY project for some, a heavy chandelier often benefits greatly from professional installation.
- Safety: Electricians have the expertise to safely handle electrical wiring and ensure proper grounding. They can accurately assess your electrical box and reinforce it if necessary.
- Weight Handling: Large chandeliers can be unwieldy and heavy. Professionals have the tools and experience to lift and secure them safely without damaging the fixture or injuring themselves.
- Efficiency: An electrician can typically install a chandelier much faster and more efficiently, saving you time and potential frustration.
- Warranty/Insurance: Many manufacturers’ warranties require professional installation. Plus, if any electrical issues arise later, having a professional do the work provides a layer of accountability.
Don’t underestimate the complexity of a chandelier installation. It’s a focal point of your living room, and you want it to be both beautiful and safe for years to come.