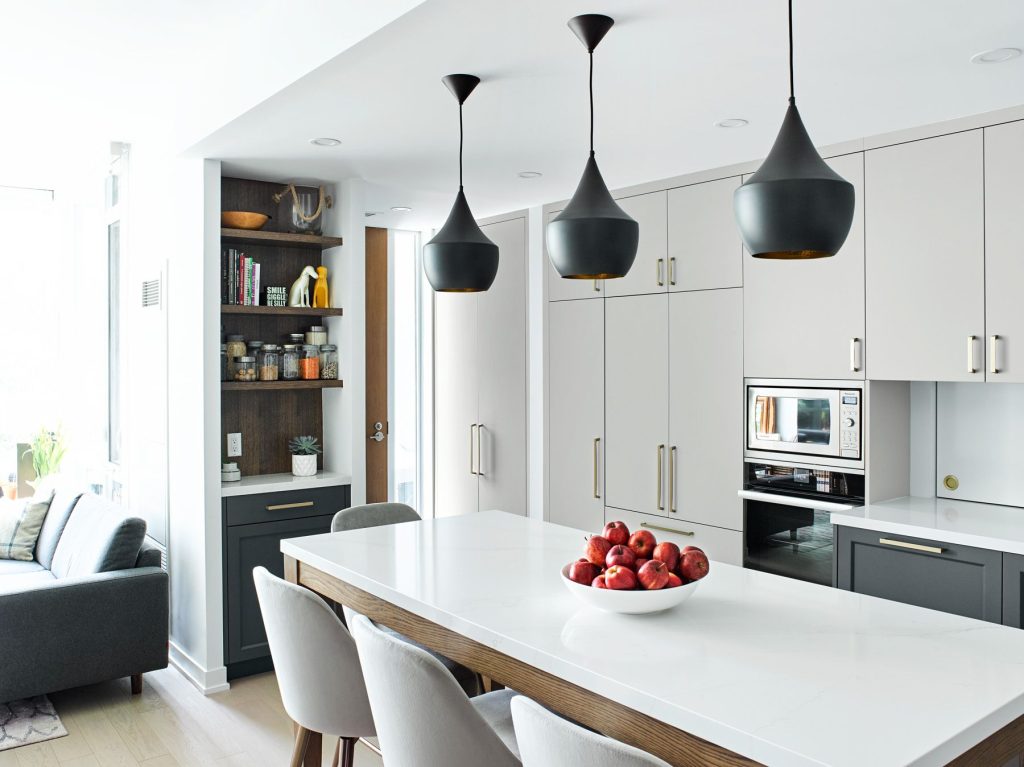
Modern Kitchen Lighting: Recessed Downlights
Recessed downlights are still a very popular and effective choice for modern kitchen lighting, and for good reason. They offer a clean, integrated look that can drastically improve both the function and ambiance of your kitchen without being visually obtrusive. While other lighting trends come and go, the discreet charm and practical benefits of recessed lighting ensure its continued relevance in contemporary kitchen design.
Recessed downlights, often just called “can lights” or “pot lights,” are designed to be installed directly into the ceiling, creating a seamless and uncluttered aesthetic. This makes them ideal for kitchens where you want the focus to be on your countertops, cabinetry, or even an island, rather than on the light Lamolighting fixtures themselves.
The Clean Look
One of the biggest draws of recessed lighting is its ability to disappear. Unlike pendant lights or surface-mounted fixtures, downlights don’t interrupt sightlines or draw attention away from other design elements. This is especially valuable in modern kitchens, which often prioritize sleek lines and minimalist aesthetics.
Space Saving
In kitchens with lower ceilings, bulky light fixtures can make the space feel cramped and visually heavy. Recessed downlights solve this problem by being flush with the ceiling, maintaining an open and airy feel.
Versatile Illumination
Don’t let their simple appearance fool you; recessed downlights are incredibly versatile when it comes to lighting design. You can use them for general ambient lighting, task lighting over work surfaces, or even to highlight specific features.
Understanding the Different Types of Recessed Downlights
Not all recessed downlights are created equal. There are several key distinctions that impact their performance, appearance, and suitability for different kitchen areas.
Housing Types
The housing is the part of the light fixture that sits above the ceiling.
New Construction Housing
This type is designed to be installed during the initial construction phase of a building or a significant remodel when the ceiling joists are exposed. They typically attach directly to the joists.
Remodel Housing
If you’re upgrading your kitchen lighting without tearing out your entire ceiling, remodel housing is your go-to. These housings are designed to be installed through a hole cut in an existing ceiling and include clips that secure them in place.
Air-Tight (AT) Housing
These are sealed to prevent air leakage, making them a good choice for energy efficiency, especially in climates with significant temperature differences between inside and above the ceiling. They help maintain your home’s insulation envelope.
IC-Rated vs. Non-IC Rated
This is a crucial distinction. “IC” stands for “Insulation Contact.”
- IC-Rated: These fixtures are safe to be in direct contact with insulation. They have a thermal protector that prevents overheating if insulation covers them. Always opt for IC-rated fixtures in residential kitchens unless you are absolutely sure there will be no insulation above them.
- Non-IC Rated: These fixtures require at least 3 inches of clearance from insulation. If insulation comes into contact with a non-IC rated fixture, it can create a fire hazard due to overheating. These are rarely suitable for modern residential kitchens.
Trim Styles
The trim is the visible part of the downlight that you see from below the ceiling. This is where most of the aesthetic choices come into play.
Baffle Trim
This is the most common type. Baffle trims have a series of concentric rings (usually black or white) designed to absorb stray light and reduce glare. This makes them excellent for general illumination where you don’t want harsh reflections.
Specular Trim
Specular trims have a shiny, mirrored, or polished finish (often chrome, gold, or anodized aluminum). They reflect light more efficiently, increasing the lumen output and making the light appear brighter. However, they can also increase glare, so they are often used for accent lighting rather than direct task lighting.
Gimbal Trim (Adjustable Trim)
Gimbal trims allow you to adjust the direction of the light. The inner reflector can be tilted and rotated, making them perfect for highlighting artwork, architectural features, or specific work areas like a kitchen island.
Pinhole Trim
As the name suggests, pinhole trims have a very small opening, creating a focused beam of light. They offer a very discreet look but provide less general illumination. They are best suited for accent lighting or creating dramatic effects.
Wall Wash Trim
These trims are specifically designed to direct light towards a wall, creating an even wash of light. They can be used to highlight textured walls, cabinets, or backsplashes.
Shower/Wet Location Trim
These trims have a sealed lens to protect the bulb from moisture and are necessary for areas where the light might be exposed to steam or splashes, such as near a sink or above a stovetop without a powerful exhaust hood.
Strategic Placement for Optimal Kitchen Lighting
Placing recessed downlights effectively is more art than science, but there are some fundamental principles to follow to ensure your kitchen is both well-lit and comfortable.
General Ambient Lighting
This provides the overall background illumination for your kitchen.
Grid Layout
A common strategy is to place downlights in a grid pattern across the entire ceiling. For general ambient lighting, you’ll want to space them out evenly, typically 4-6 feet apart, depending on the ceiling height and the desired brightness. The goal is to create a uniform wash of light without dark spots or excessive bright zones.
Perimeter Lighting
Some designers prefer to place downlights closer to the edges of the room, shining down onto the countertops and cabinetry. This can create a welcoming glow and highlight wall-mounted elements.
Task Lighting Where It Matters Most
This is perhaps the most critical application for recessed lighting in a kitchen. Good task lighting is essential for safe and efficient food preparation.
Over Countertops
Directly above your main prep areas, you’ll want focused downlights. These should be positioned so that the light falls directly onto the work surface and not behind you, which would create shadows. A good rule of thumb is to place them about 24-30 inches out from the wall, allowing the light to hit the counter without glare from cabinets. Use narrower beam angles (30-45 degrees) for more focused light.
Over Sinks
A dedicated downlight directly above the sink is highly recommended. Not only does it help with washing dishes, but it also illuminates the immediate area as you fill pots or clean produce.
Over the Cooktop/Range
While most ranges have their own built-in light, an additional downlight can supplement this, especially if you have a large range or a powerful hood that can otherwise cast shadows. Ensure it’s an IC-rated fixture.
Accent and Decorative Lighting
Beyond the practical, recessed downlights can also enhance the aesthetics of your kitchen.
Highlighting Features
Use adjustable (gimbal) trims to direct light onto an interesting backsplash, textured wall, or open shelving with decorative items. This adds depth and visual interest to the room.
Creating Mood
Combine different circuits and dimmers to create different lighting “scenes.” Bright for cooking, softer for entertaining, or a subtle glow for a late-night snack.
Over a Kitchen Island
If your island is primarily a workspace, treat it like a countertop, ensuring even task lighting. If it’s a social hub, consider a combination of functional downlights and perhaps a decorative pendant or two to define the space and provide a softer glow. For islands, ensure the downlights are positioned to avoid glare for those seated around it.
The Importance of Bulb Selection (LEDs are King)
While the fixture itself is important, the actual light output comes from the bulb. In modern kitchen lighting, LEDs are the undisputed champion.
Energy Efficiency
LEDs consume significantly less power than traditional incandescent or even CFLs, leading to substantial energy savings over time. This is especially true in a kitchen where lights are often on for extended periods.
Longevity
LED bulbs have an incredibly long lifespan, often tens of thousands of hours. This means fewer bulb changes, which is a big convenience, especially for recessed fixtures.
Color Temperature (Kelvin)
This refers to the “warmth” or “coolness” of the light, measured in Kelvin (K).
Warm White (2700K-3000K)
This mimics the soft, cozy glow of traditional incandescent bulbs. It’s often preferred for dining areas and creates a welcoming, relaxed ambiance.
Cool White (3500K-4000K)
This offers a more neutral, crisp light. It’s excellent for task lighting in kitchens as it provides good clarity and can make colors appear more natural. Many modern kitchens opt for this range.
Daylight (5000K-6500K)
This is a very bright, bluish-white light that closely resembles natural daylight. While some prefer it for task-intensive areas, it can feel a bit sterile in a kitchen environment if used exclusively.
Beam Angle (Degrees)
This describes how wide or narrow the light beam is.
Narrow Beam (10-35 degrees)
Ideal for accent lighting, highlighting specific objects, or for very focused task lighting. This creates more dramatic pools of light.
Medium Beam (35-60 degrees)
A good all-rounder for general ambient lighting and most task lighting applications. It provides a good balance between spread and intensity.
Wide Beam (60+ degrees)
Suitable for general room illumination in areas where you want a broad wash of light and less focused intensity.
Color Rendering Index (CRI)
CRI measures how accurately a light source renders colors compared to natural sunlight (which has a CRI of 100).
High CRI is Key (90+)
For kitchens, a high CRI is really important. It ensures that your food looks appealing and true to its natural colors. Low CRI lights can make food look dull or unappetizing. Aim for LEDs with a CRI of 90 or higher.
Dimming Capabilities
Always choose dimmable LED bulbs and compatible dimmers. Dimmability vastly increases the versatility of your kitchen lighting, allowing you to adjust the mood and brightness for different activities.
Installation Considerations and Best Practices
While installing recessed lighting can be a DIY project for the experienced, it often benefits from professional installation, especially when dealing with new wiring.
Hiring an Electrician
For safety and compliance with electrical codes, it’s highly recommended to use a licensed electrician. They can ensure proper wiring, grounding, and address any potential issues.
Ceiling Joist Obstructions
Before cutting any holes, it’s crucial to map out your ceiling joists. Recessed housings cannot pass through structural joists. An electrician can use a stud finder or other tools to locate these.
Avoiding Glare
Glare is a common complaint with recessed lighting. To minimize it:
- Proper Placement: Don’t put lights directly above where someone will be standing and looking down. Position them slightly forward.
- Baffle Trims: As mentioned, these are excellent for reducing glare.
- Beam Angle: Use narrower beam angles for tasks to focus light where it’s needed without spilling it too widely.
- Dimming: The ability to dim lights is crucial for controlling brightness and glare.
Connecting to Smart Home Systems
Modern recessed lighting can easily be integrated into smart home ecosystems.
Smart Dimmers
Replace standard dimmers with smart dimmers that connect to Wi-Fi or a hub (like Zigbee or Z-Wave). This allows for voice control, app control, and scheduling.
Smart Bulbs
Some recessed fixtures allow for smart bulbs that have built-in Wi-Fi or Bluetooth, offering individual control over color temperature, brightness, and even color (though color-changing lights are less typical for kitchen downlights).
Zoning
Create different lighting zones in your kitchen. For example, have your perimeter lights on one switch/dimmer, island lights on another, and task lighting over countertops on a third. This provides maximum flexibility.
Maintaining and Troubleshooting Recessed Downlights
Once installed, recessed downlights are generally low-maintenance, especially with LEDs.
Cleaning
Periodically, you might need to wipe down the exterior trim to remove dust or grease buildup. Always turn off the power to the fixture before cleaning.
Bulb Replacement
While LED bulbs last a very long time, they will eventually fail. When replacing a bulb, ensure the power is off, and match the wattage and base type (e.g., E26 or GU10) with the previous bulb. If using a high-quality integrated LED fixture, the entire unit may need to be replaced, though this is less common with modern designs.
Common Issues
Flickering Lights
This can be caused by a few things:
- Incompatible Dimmer: The most common cause with LEDs. Ensure your dimmer is specifically rated for LED bulbs.
- Loose Connection: A poor electrical connection at the switch, fixture, or junction box.
- Faulty Bulb: The LED driver or bulb itself might be failing.
Lights Not Working
- Tripped Breaker: Check your electrical panel first.
- Loose Wiring: An electrician will need to inspect connections.
- Faulty Switch/Dimmer: The control mechanism might be bad.
- Dead Bulb: Straightforward replacement.
Buzzing or Humming
- Incompatible Dimmer: Again, a common culprit with LEDs.
- Loose Wiring: Can sometimes cause inductive humming.
The Future of Recessed Lighting in Kitchens
Recessed downlights aren’t going anywhere. In fact, they’re evolving.
Smaller Apertures
The trend is towards even smaller, more discreet fixtures with greater lumen output from tiny apertures. This enhances the “invisible light source” effect.
Tunable White Technology
Advanced LED fixtures now offer “tunable white” capabilities, allowing you to adjust the color temperature from warm to cool throughout the day. Imagine warmer light in the morning and evening, and cooler, brighter light during active cooking times.
Integrated Smart Features
More fixtures are coming with integrated smart chips, allowing for seamless connection to home automation systems without needing smart bulbs or external dimmers.
Enhanced Optics
Improved optics mean better light distribution, less glare, and more precise beam control from smaller sources.
In essence, recessed downlights remain a cornerstone of modern kitchen lighting design due to their unbeatable combination of aesthetics, functionality, and adaptability. When planned and installed correctly, they create a beautifully illuminated, highly functional, and inviting kitchen space.